How to install a mosaic tile backsplash DIY

You will need:
Wall tiles Measuring tape or ruler Sharpie Inexpensive plates Hammer Tile adhesive Grout Grout sealer notched trowel grouting sponge tile-cutting hand toolsStep 1: Cut the Tiles
Be very careful when you’re breaking up the tiles! You should always wear safety glasses, and handle the broken pieces with care so you don’t get cut.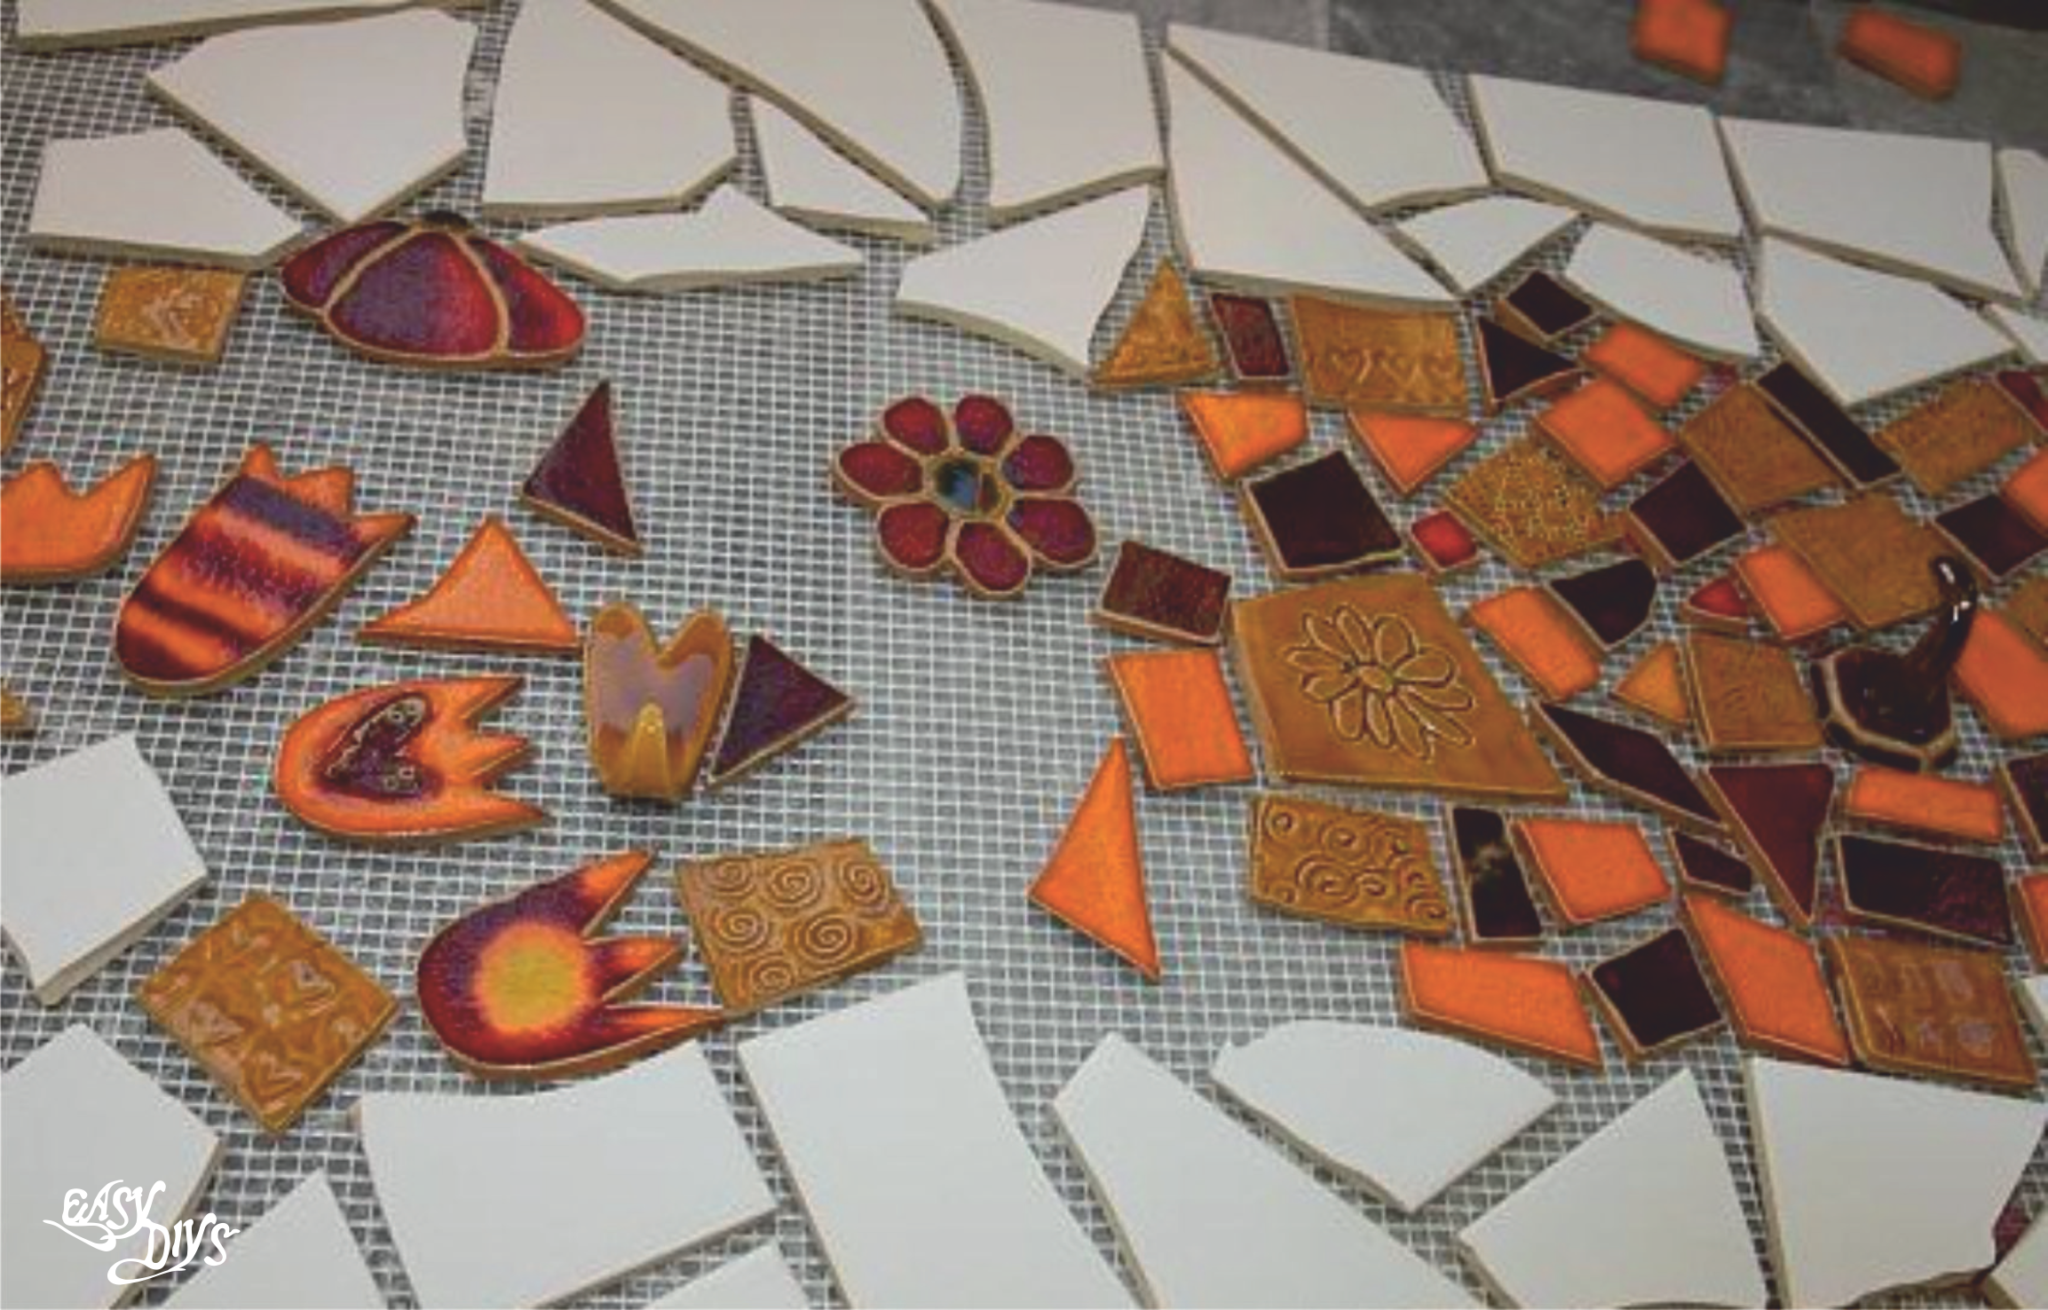
Step 2: Apply the Mastic
Wall tile adhesive comes pre-mixed or in powder form. If you are using the powder mix it with water until it is the consistency of peanut butter. Don’t mix too much in advance, or it will begin to set up on you before you can use it. Using your grooved trowel, start spreading the mortar over a small area. Never do more than what you can cover. Hold the trowel at a 45-degree angle to the wall. Tile adhesive dries rather quickly, so spread only as much adhesive as you can tile in about 15 minutes.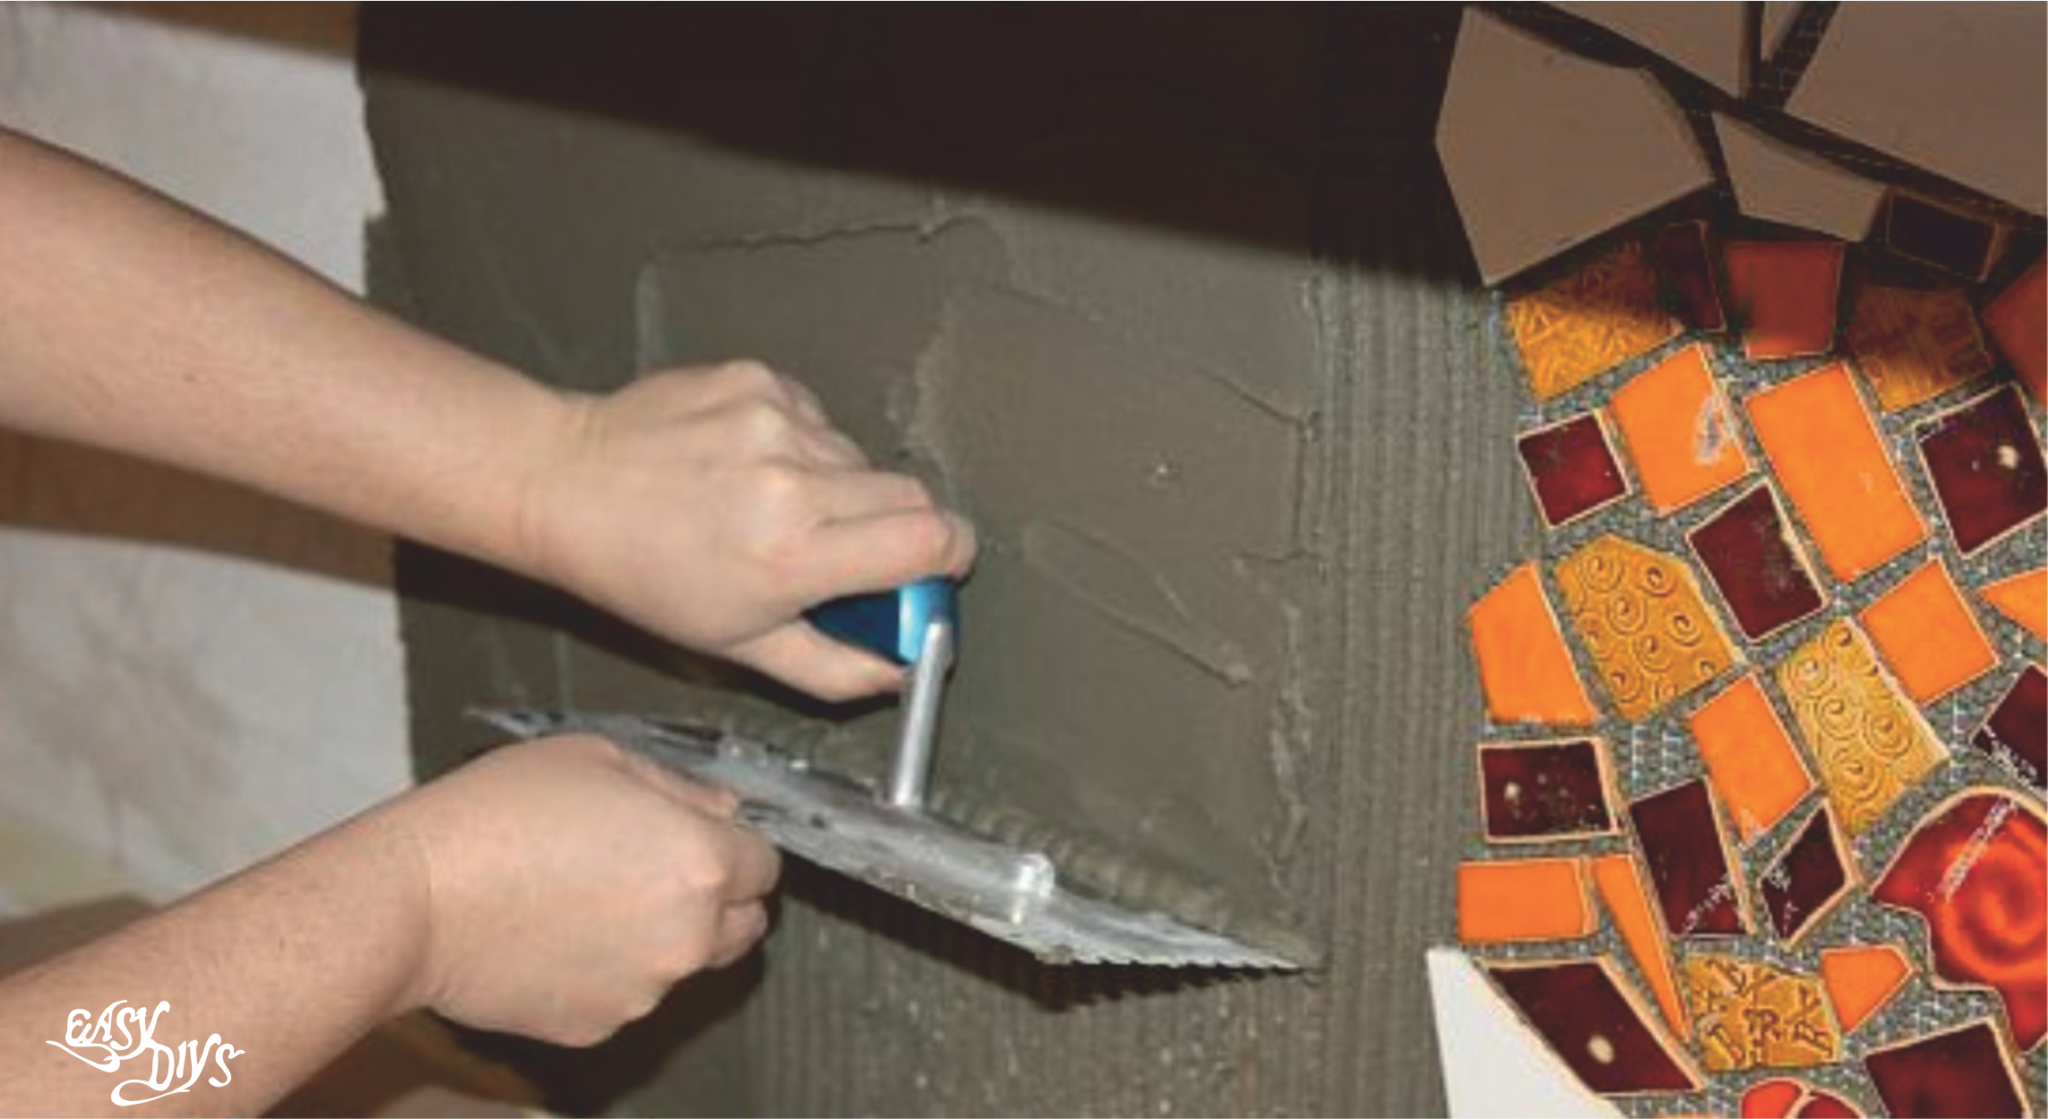
Step 3: Install the Tiles
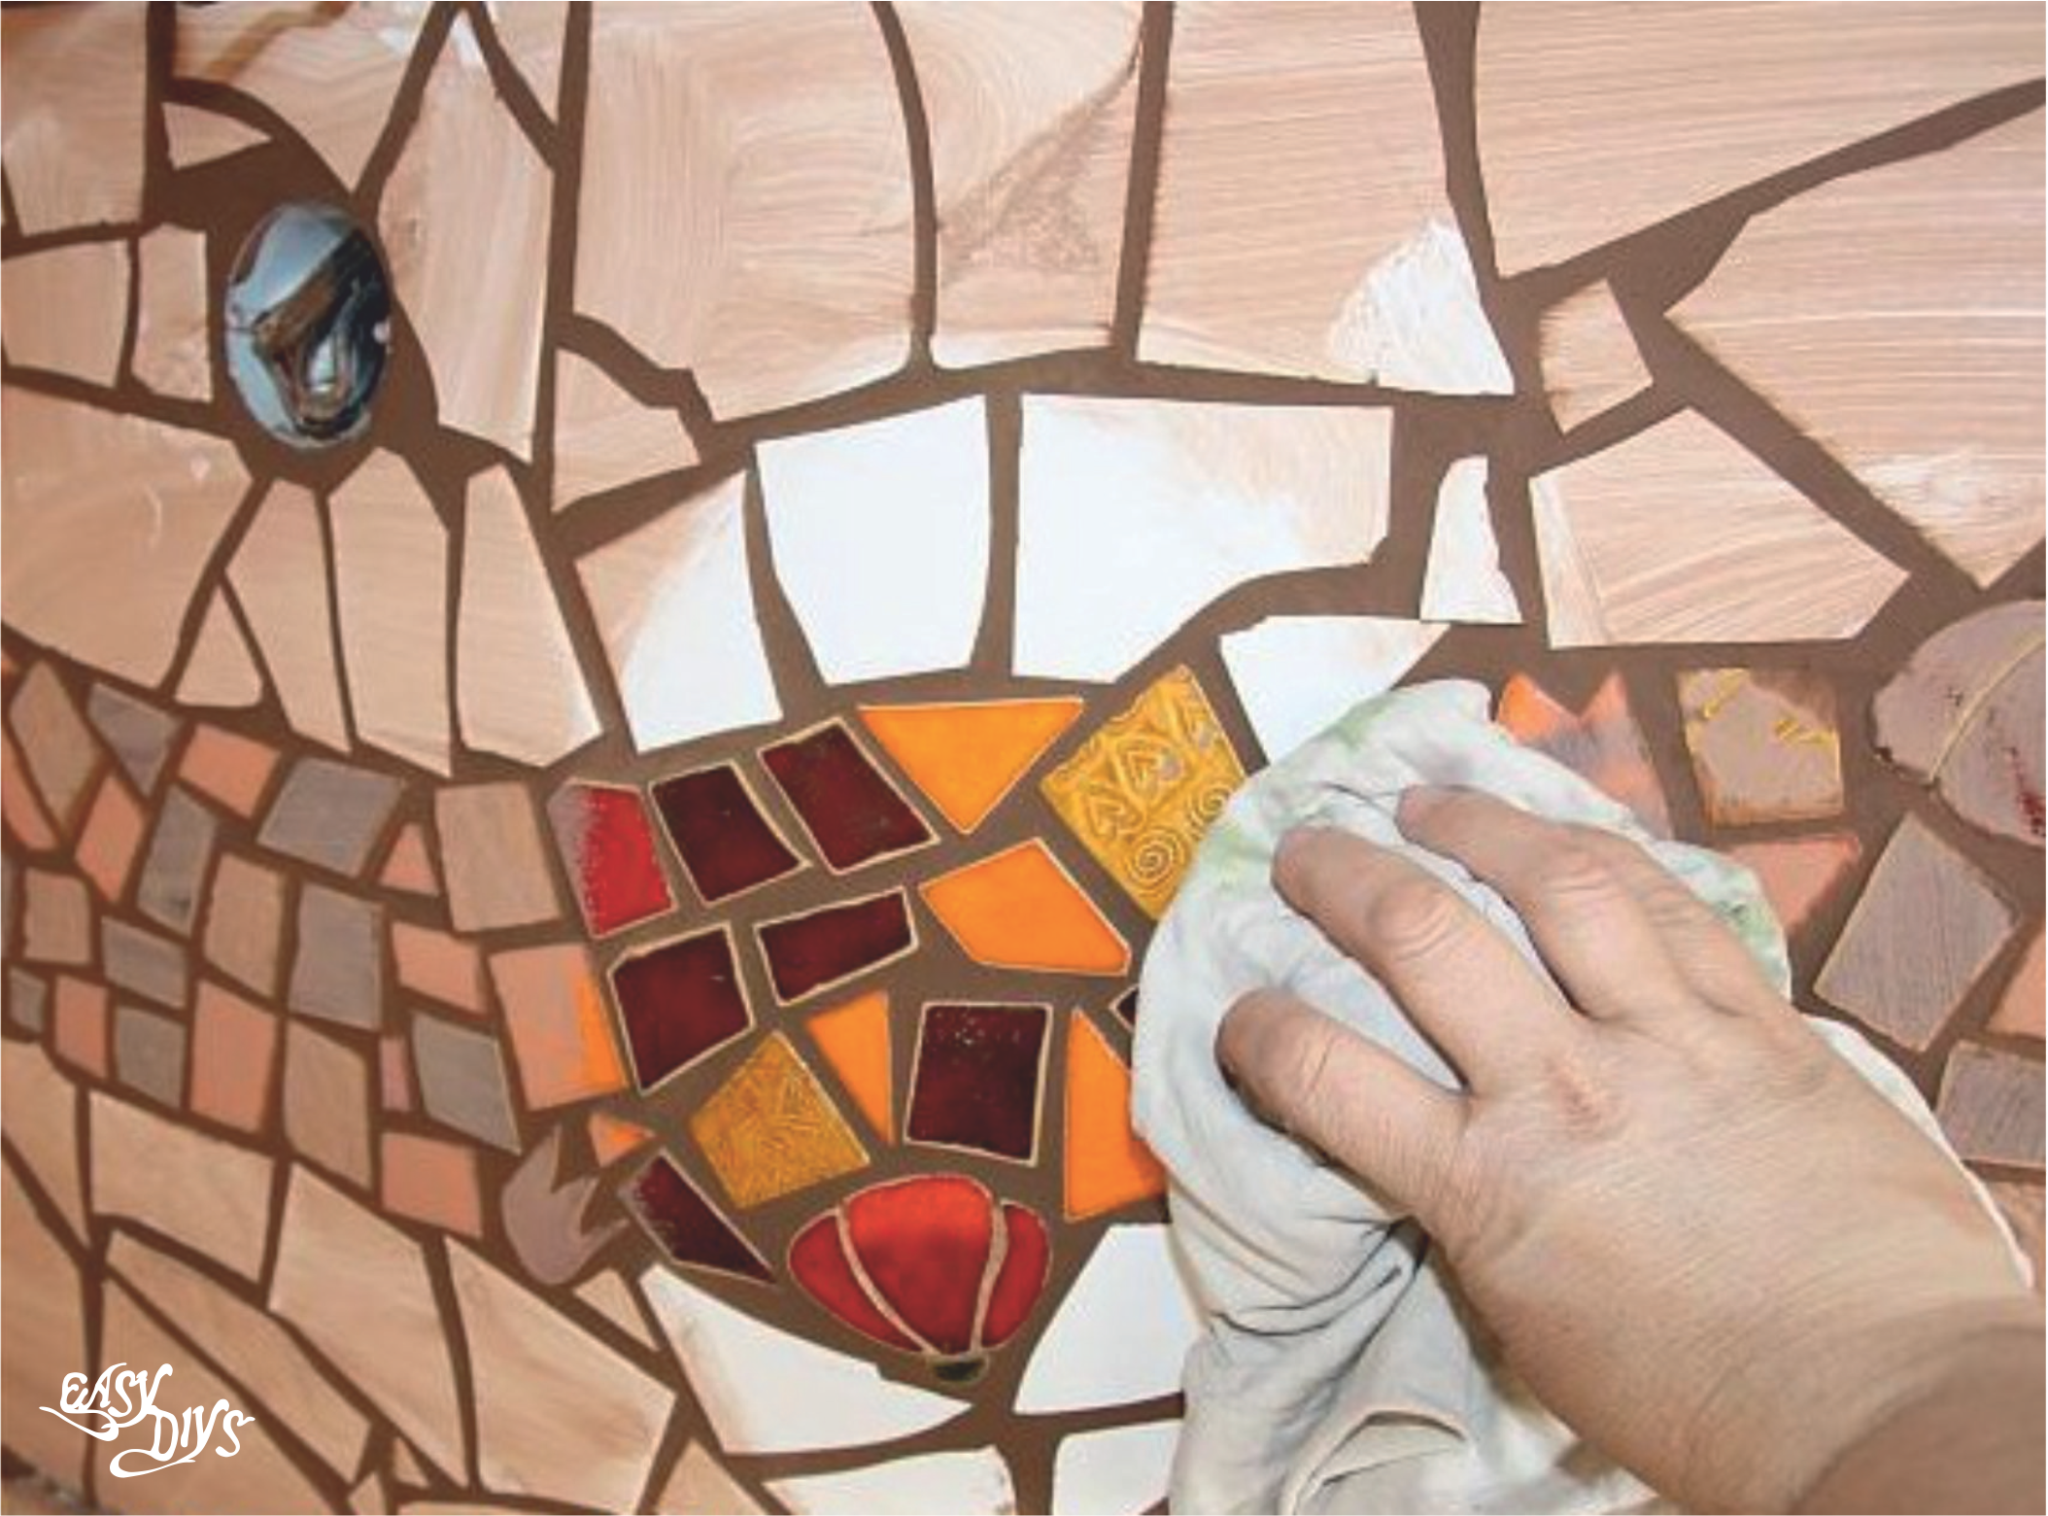
Carefully pick out all of the pieces from the edges of the tiles. Starting from the corners and working outward, use the pieces of the tiles to fill in the border area. It’s kind of like putting together a puzzle! Press it onto the wall with your hand. If the sheet slides around and mortar comes through the joint lines, you’re applying it too thick (remove the sheet, scrape off some grout and retrowel). If you start getting frustrated trying to fit the pieces together, walk away for a few minutes and focus on something else so you can come back with fresh eyes…Step 4: Grout
Wait 24 hours after installing the tile to add the grout. Force the grout into the joints with a float. Scrape off excess grout by moving the float diagonally across the tile. Mix the grout with water until it reaches mashed potato consistency, then put some on the wall with a grout float. Work the grout into the joints by moving the float diagonally over the tiles. Grout: it’s gritty, abrasive stuff. You only want to mix as much as you can apply in about a half hour, as it will begin to dry out.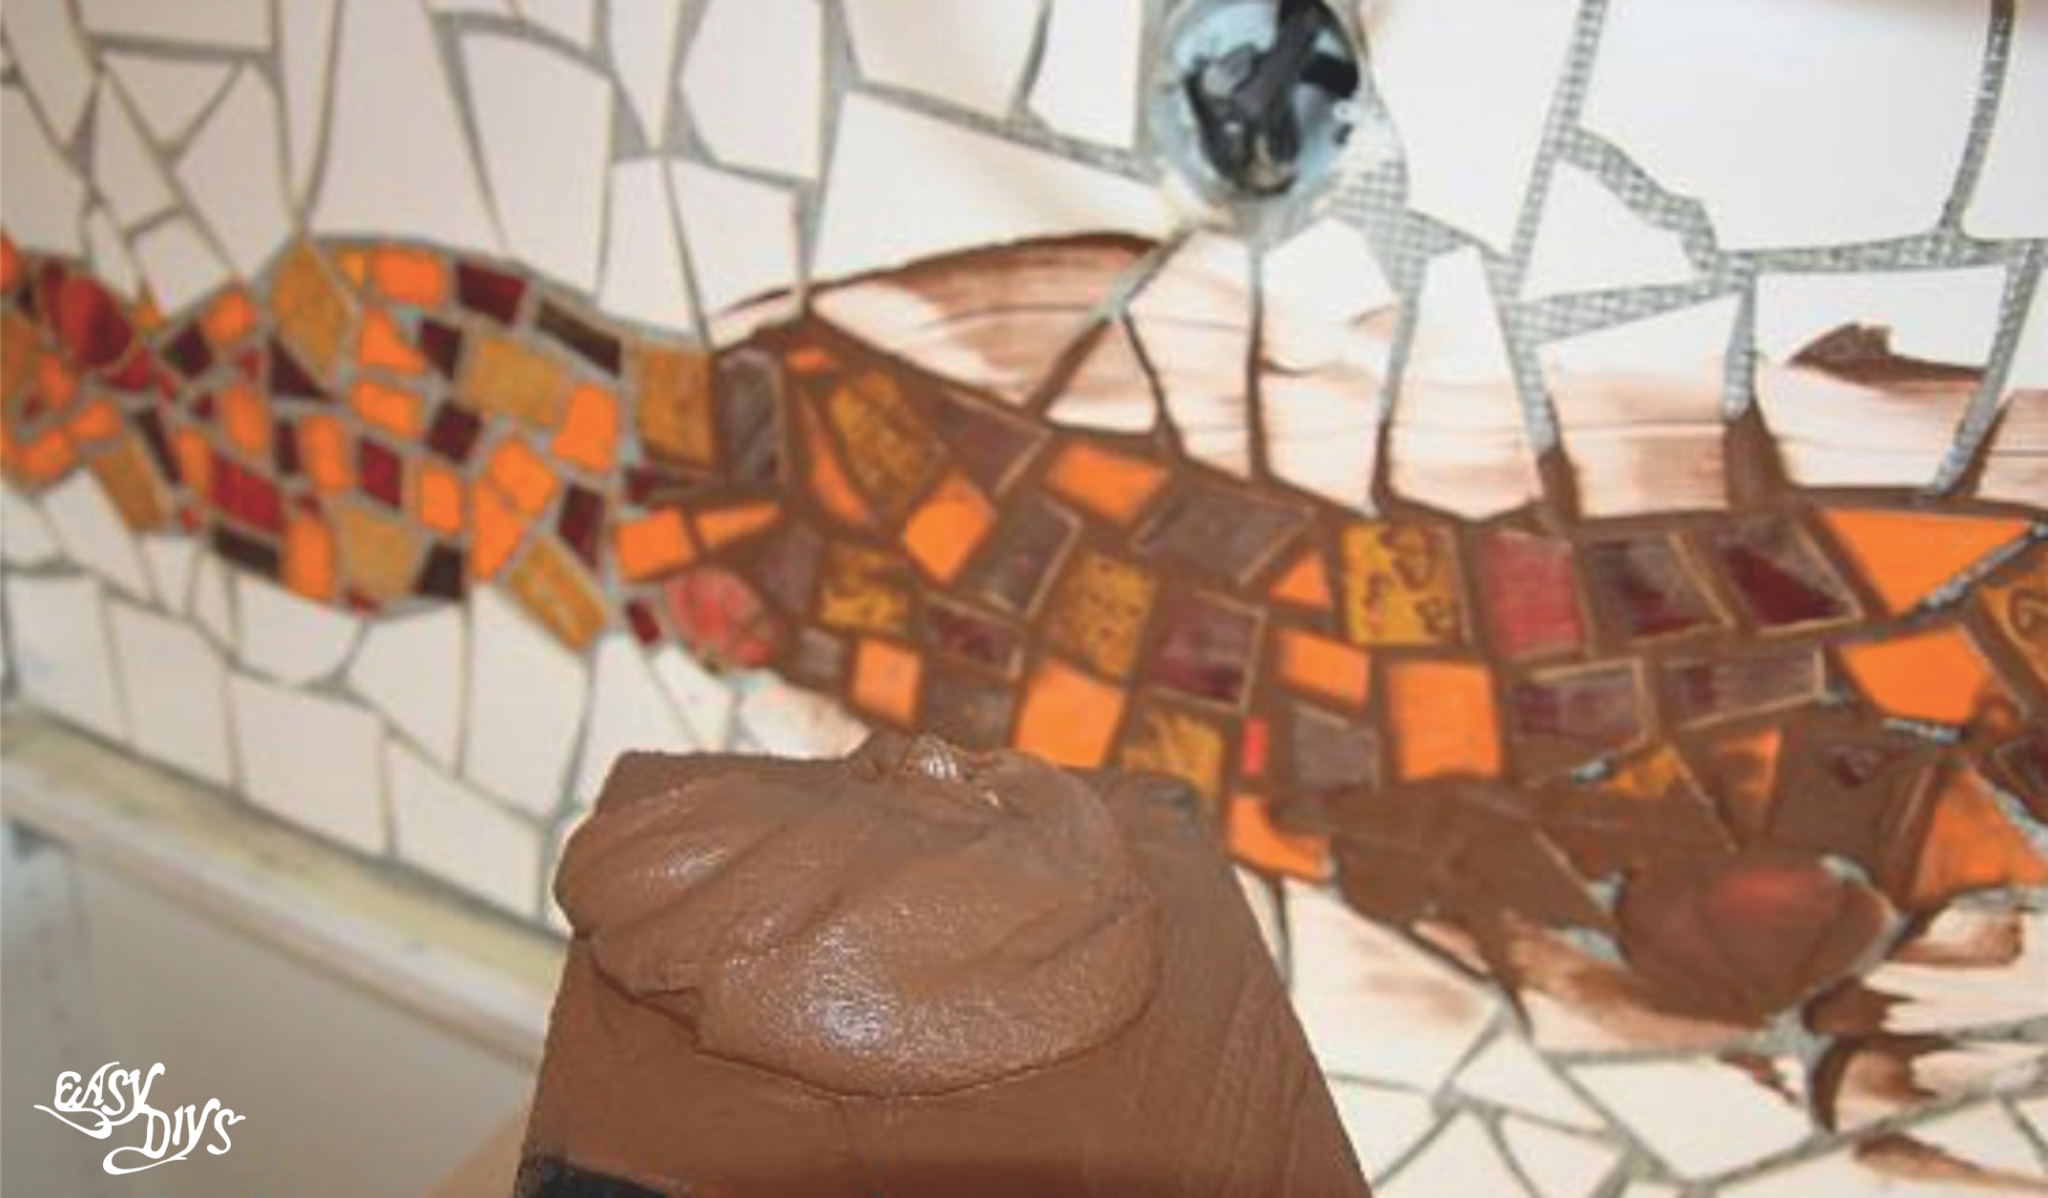
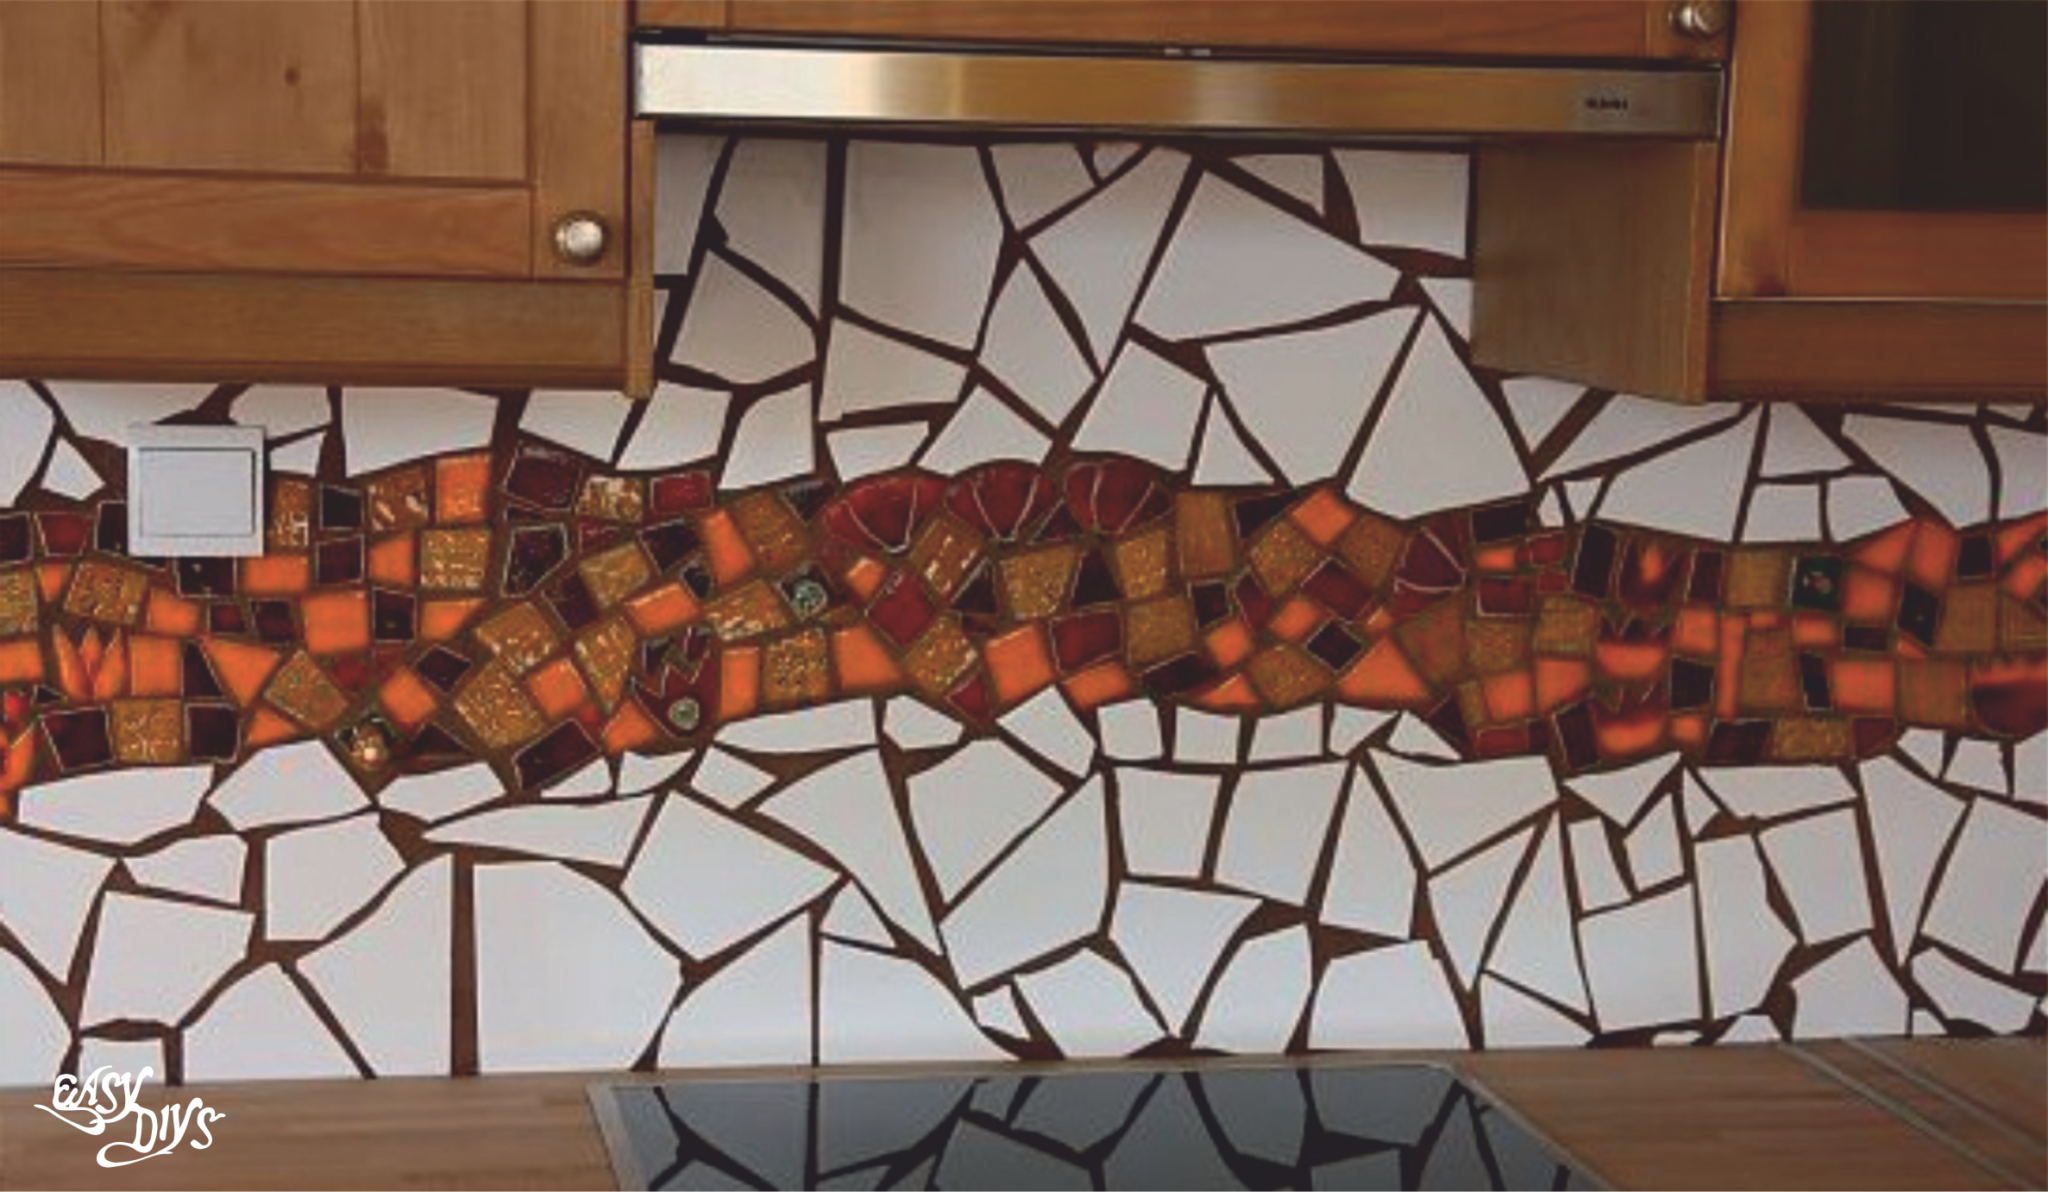
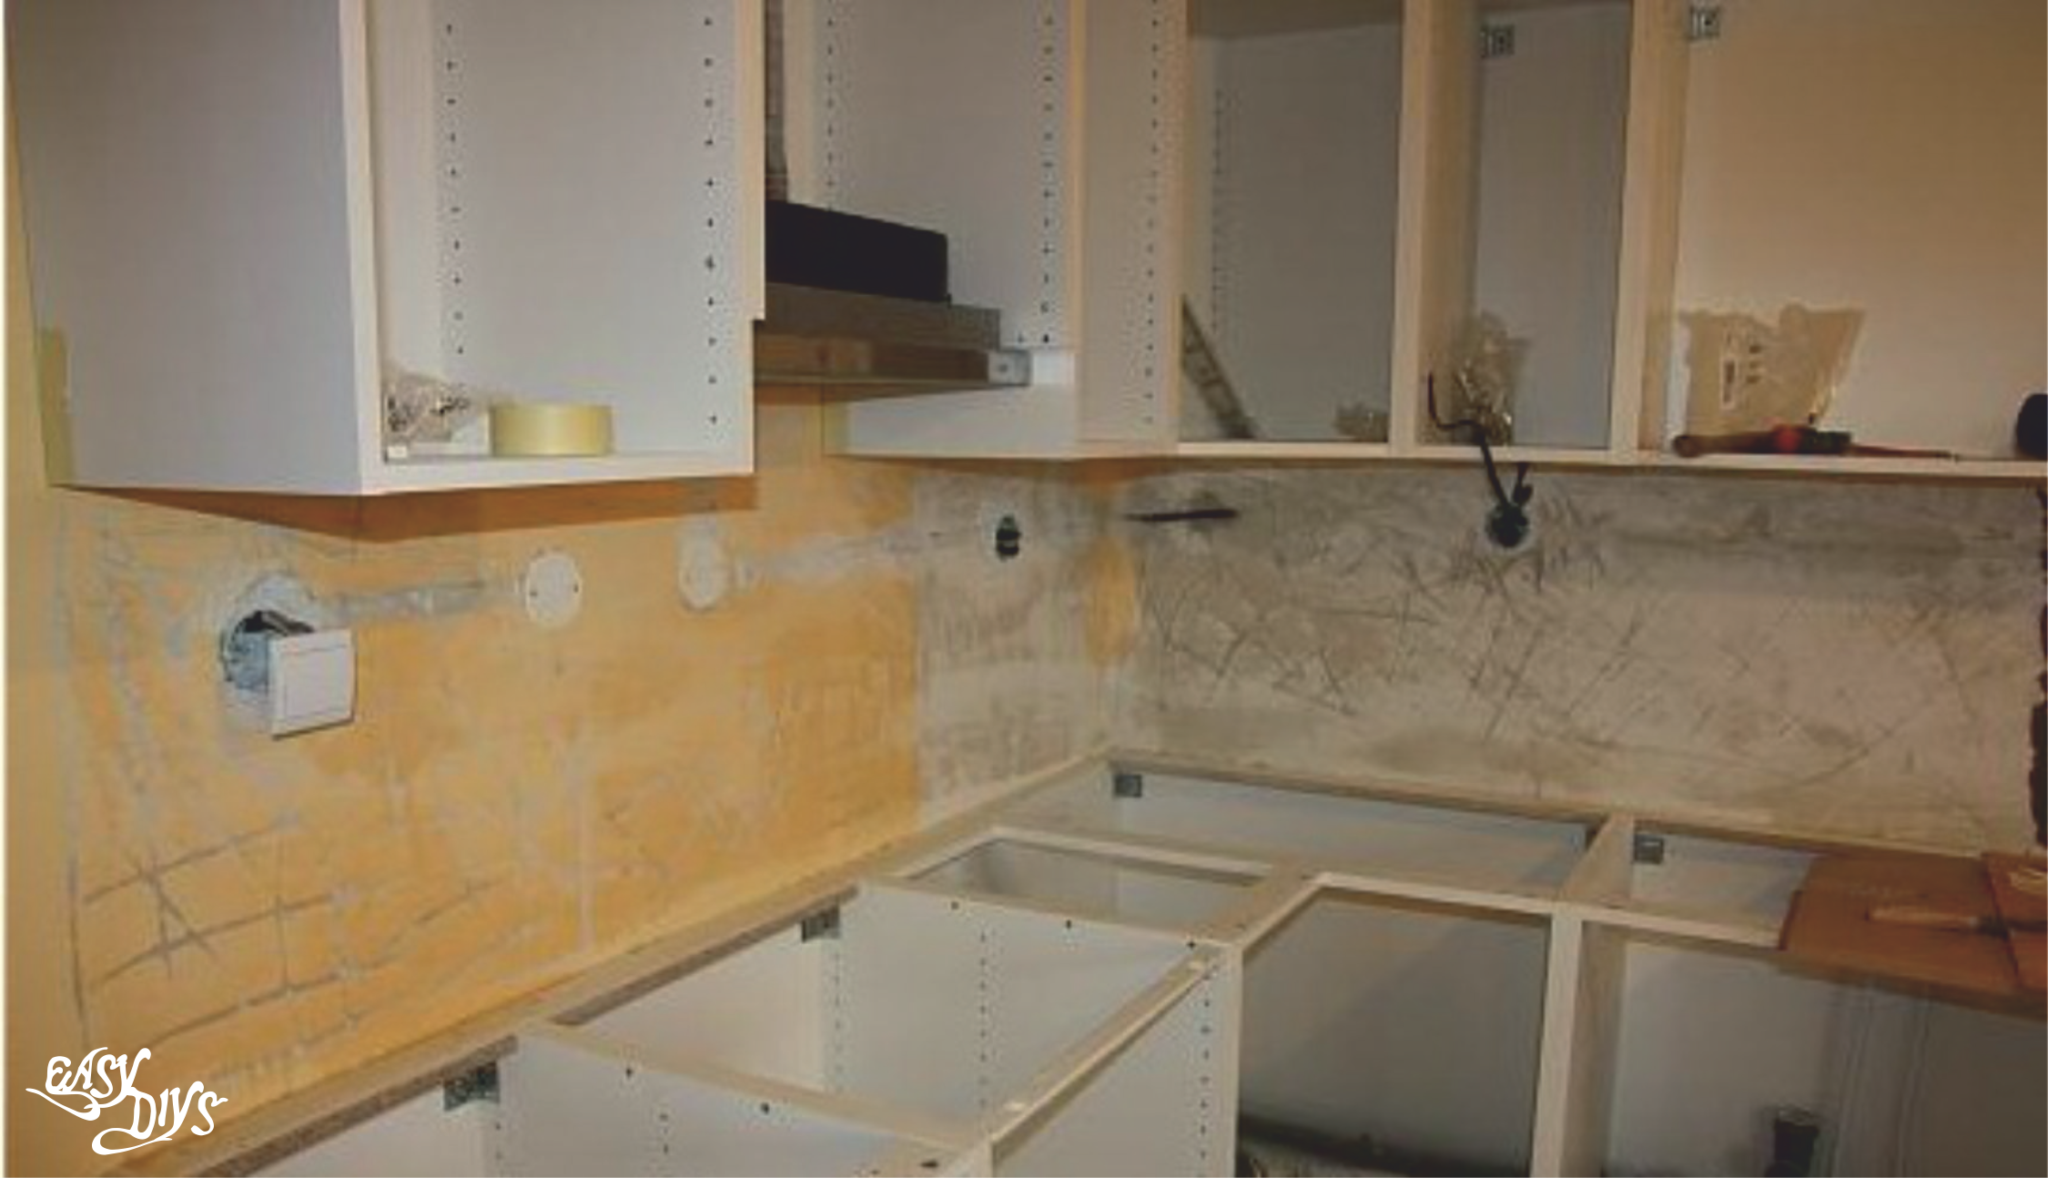
Before:
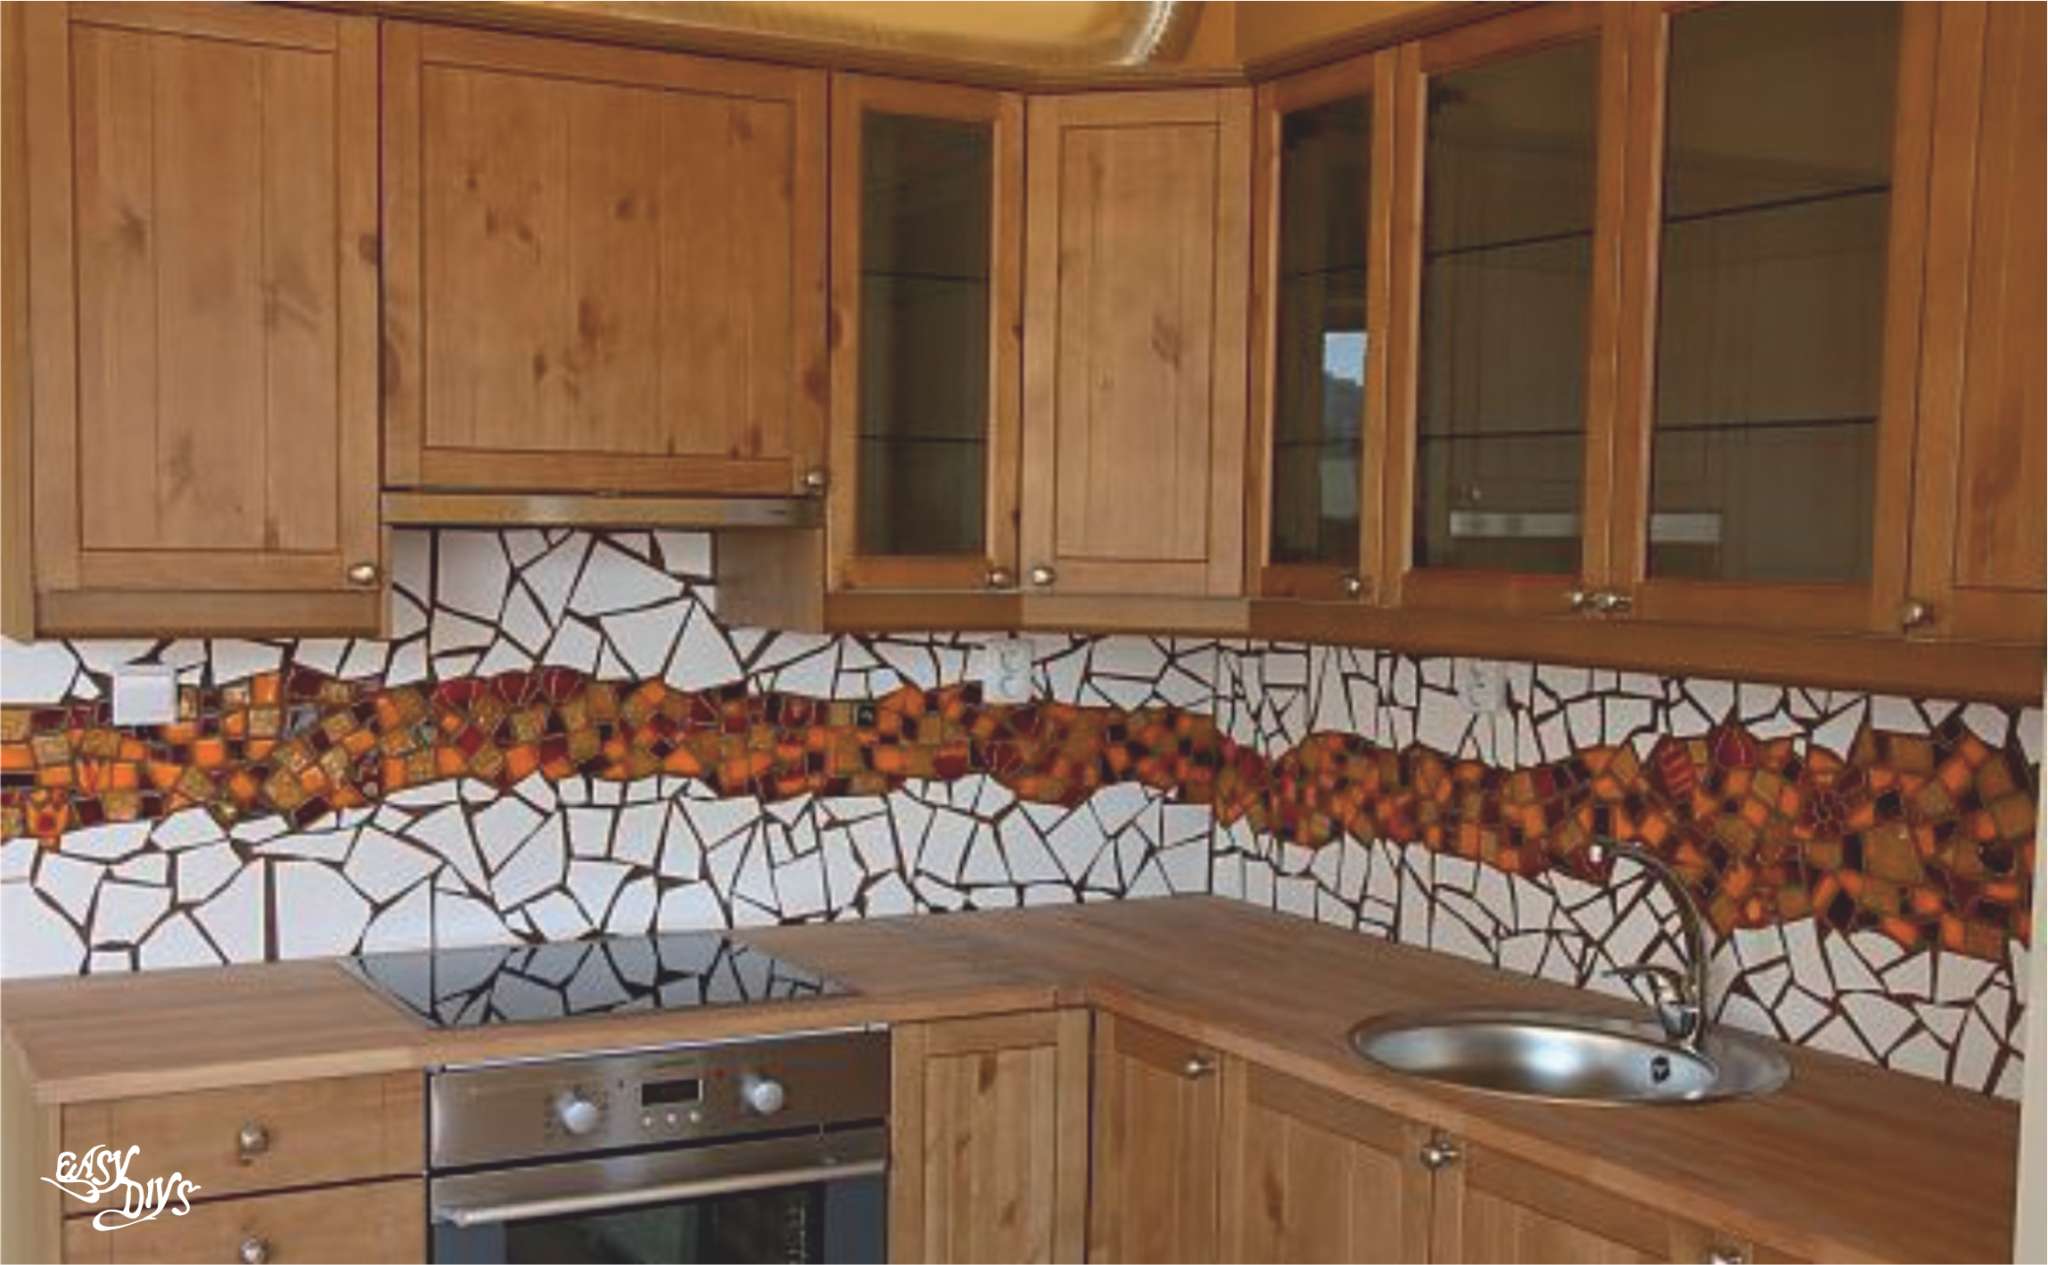
After:
Other Posts

Hot Air Balloon Sewing Pattern
This is the perfect handmade addition to a baby’s room and is one of those pieces you just know will be treasured forever. Because this could easily become a keepsake, we would recommend using a good quality wool felt. To make this DIY baby mobile simply save the...

Perfect Waves for a Wedding
If you are a lucky owner of naturally curly healthy hair, you have everything you need for a fantastic look. Just use a jeweled hairpin or a large flower to keep your side locks a bay. You are going to look super exotic – just right for a destination beach wedding!...
Easy hairstyles for long hair for school step by step
Parents, rejoice! Back-to-school season is nearly upon us! But here’s the thing… The first day of school is all about making that perfect first impression. I mean, it kinda sets the stage for the entire school year, right? So in other words, it’s imperative that...

Manhattan cocktail recipe
Make it a Manhattan kind of night and the highlight of any Happy Hour with the Basil Hayden Bourbon take on the classic cocktail. Manhattan Cocktail RecipeI find the Manhattan cocktail recipe certainly an extremely intriguing one. And it also was subject to...

Healthy granola recipe
Quick and easy to make, this homemade chocolate cherry granola is a fantastic breakfast or snack. Especially when it’s homemade – so much better and healthier then the stuff you get at the store. Plus you can put whatever you want in it then. Including chocolate....
Colourful feed-in Braids with Extensions
Colourful hairstyle for summer/festival hair. Bright hues like pink, blue and green give this otherwise straightforward style a fresh twist. Even better, opting for extensions means you can get a striking look without damaging your hair with bleach or dye. The...
![]()

