How to Cast 3D Miniatures

This post follows directly from the last one in which I featured one of the simplest ways of making a mould for a toy Gigi .. Check out my tutorial for mold making. Casting is a lot of fun and is very rewarding to see your little miniatures turn into multiple copies. And it really isn’t that hard. You can be casting your own minis in no time at all with a few basic materials.
Once your molds are made, you’re ready to cast. You definitely want to wear gloves for this. The silicone rubber has the valuable property not only of flexing easily but returning exactly to its original shape without distortion. This means that if you do make a block mould form around a head shape and the sides of the mould are thick enough (i.e. around what will become the negative void of the head and neck) the silicone can be split with a sharp knife just enough to be able to take the form out. Afterwards you will have to coax the cut surfaces back into the right position, but the silicone should ‘marry’ again perfectly if it has set properly in the first place, so much so that you probably won’t see the cut anymore! With the right gentle support i.e. rubber bands or tape binding the outside but not too tightly, the mould can be filled as if it were uncut.
Polyurethane resins come in two equal parts, almost always mixed 1:1 by weight but in the past I’ve often got by without any problems by judging equal volumes in two disposable plastic cups, even though the weights of the two parts are slightly different. Now that I’m even more grown-up I prefer to measure properly by weight, using a fairly inexpensive kitchen weighing scales.
It is always important to think ahead when preparing for this work! Make sure that you have all your necessary tools etc. to hand .. i.e. as here, a mixing stick .. so that you don’t have to hunt around for them at short notice.
The best mixing sticks I’ve found are disposable chopsticks because they’re very resilient, clean easily and can be re-used.

You will need:
Liquid Plastic (liquid polyurethane resin) Some form of covering for the work surface (i.e. newspaper or polythene) because it can get messy. Mixing cups or pots of various sizes (I use disposable plastic cups £1 per 100 for mixing resin. Mixing sticks (‘coffee stirrers’ i.e. from Starbuck’s, Costa’s etc. are fine for small amounts of resin. Disposable chopsticks are excellent! Digital weighing scales, as mentioned A small sharp knife White spirit (you will need white spirit in case of silicone spillage. Uncured silicone rubber dissolves in white spirit.) Safety supplies including glovesAs soon as the part ‘B’ is added it should be quickly stirred in because the reaction will start within a few seconds. If the mixture needs to be decanted into a form mixing should not be more than 30 seconds before transferring it. I’ve tried mixing the material directly in the mould form a few times in the past but this has often resulted in an uneven result with parts not properly curing. Make sure you have newspaper laid underneath your molds, because this stuff is messy.
The silicone doesn’t need any release agent against the foam but plaster certainly will if you want to keep it clean .. and Vaseline will be fine.


Next, I poured the resin in a thin stream through the sprue into the mold. If the sprue isn’t wide enough, the surface tension of the resin can actually bridge across the sprue and stop it up so resin won’t pour in smoothly.
In my experience it’s rare that air gets trapped with this method and using this mix, but if you’re concerned about deep detail there’s always a bit of time to poke around with a cocktail stick or small brush to make sure air is freed.
Once the cavity of the mold was filled, I let the resin sit for about ten minutes (the recommended cure time for the resin) and double-checked that the residue spilled around the sprue was completely hardened. Polyurethane resin shows a rapid change when setting, from translucent beige to opaque ivory.
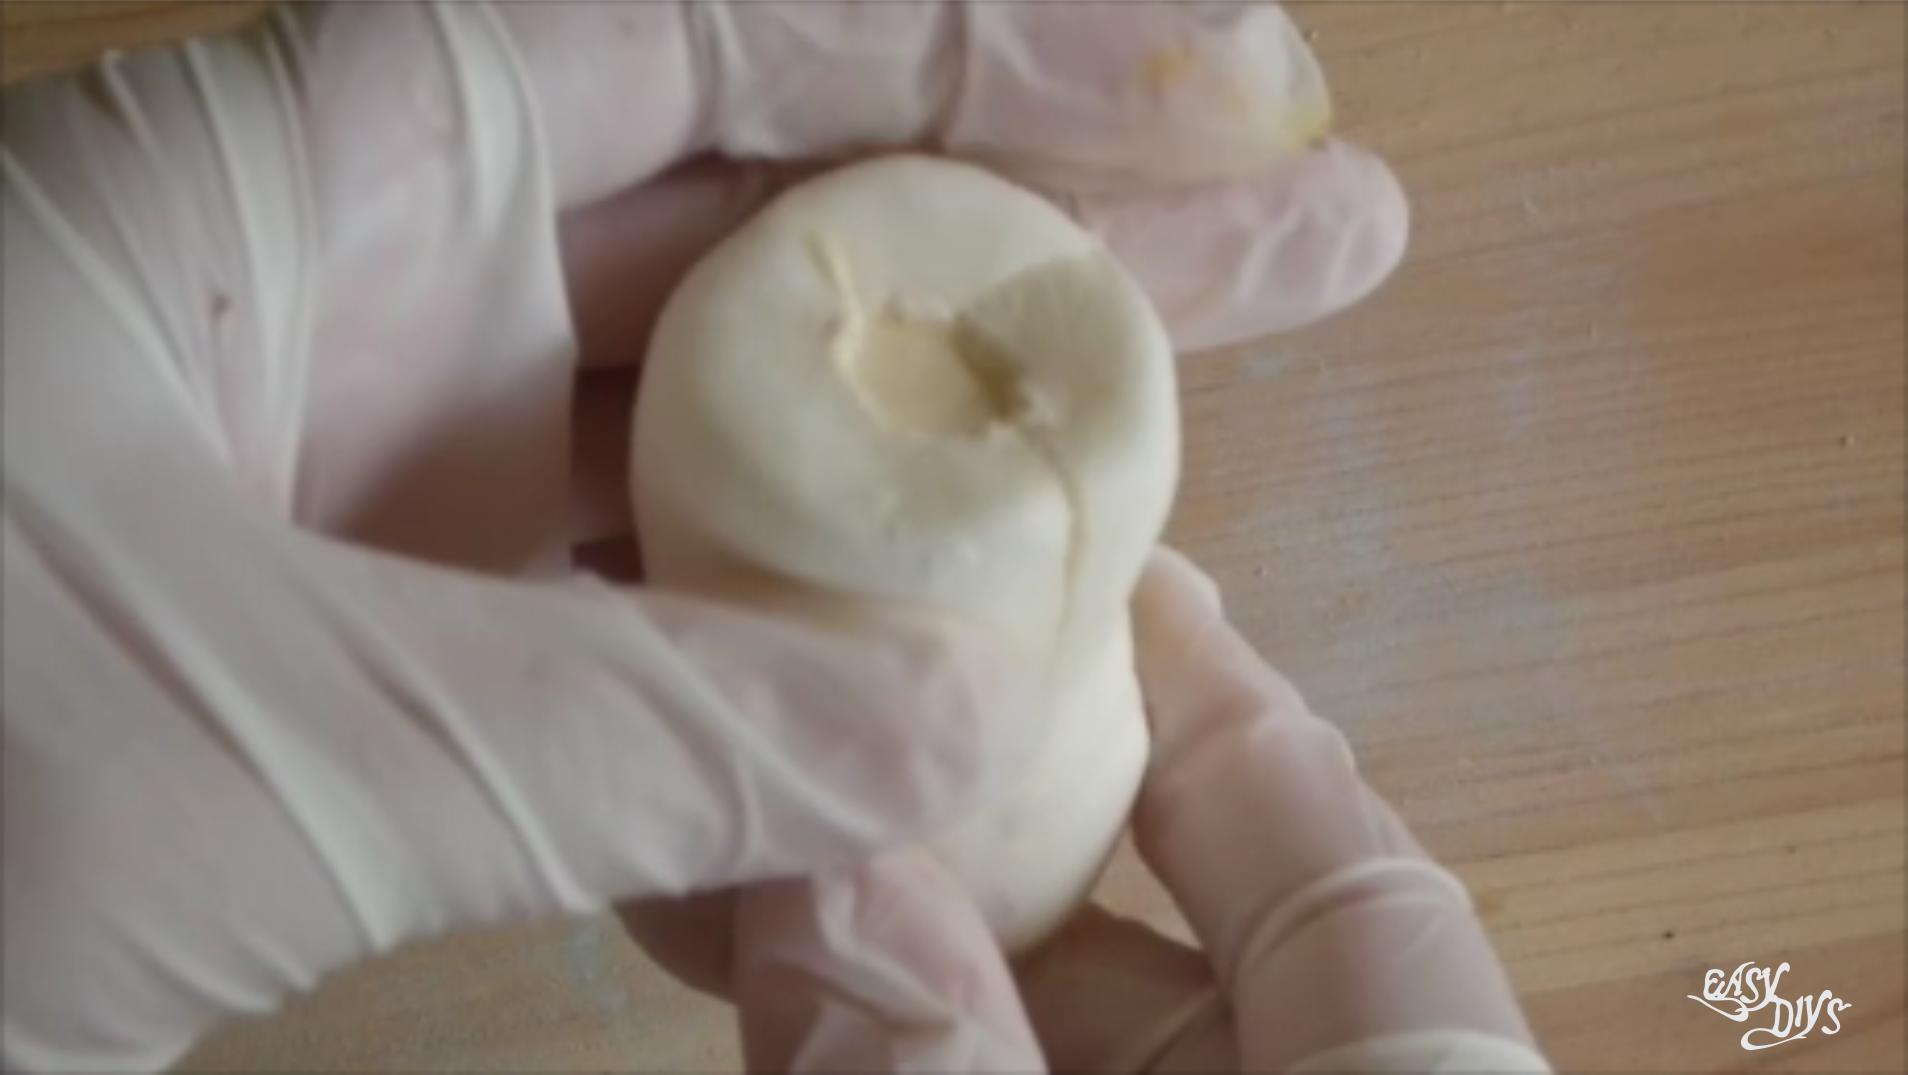
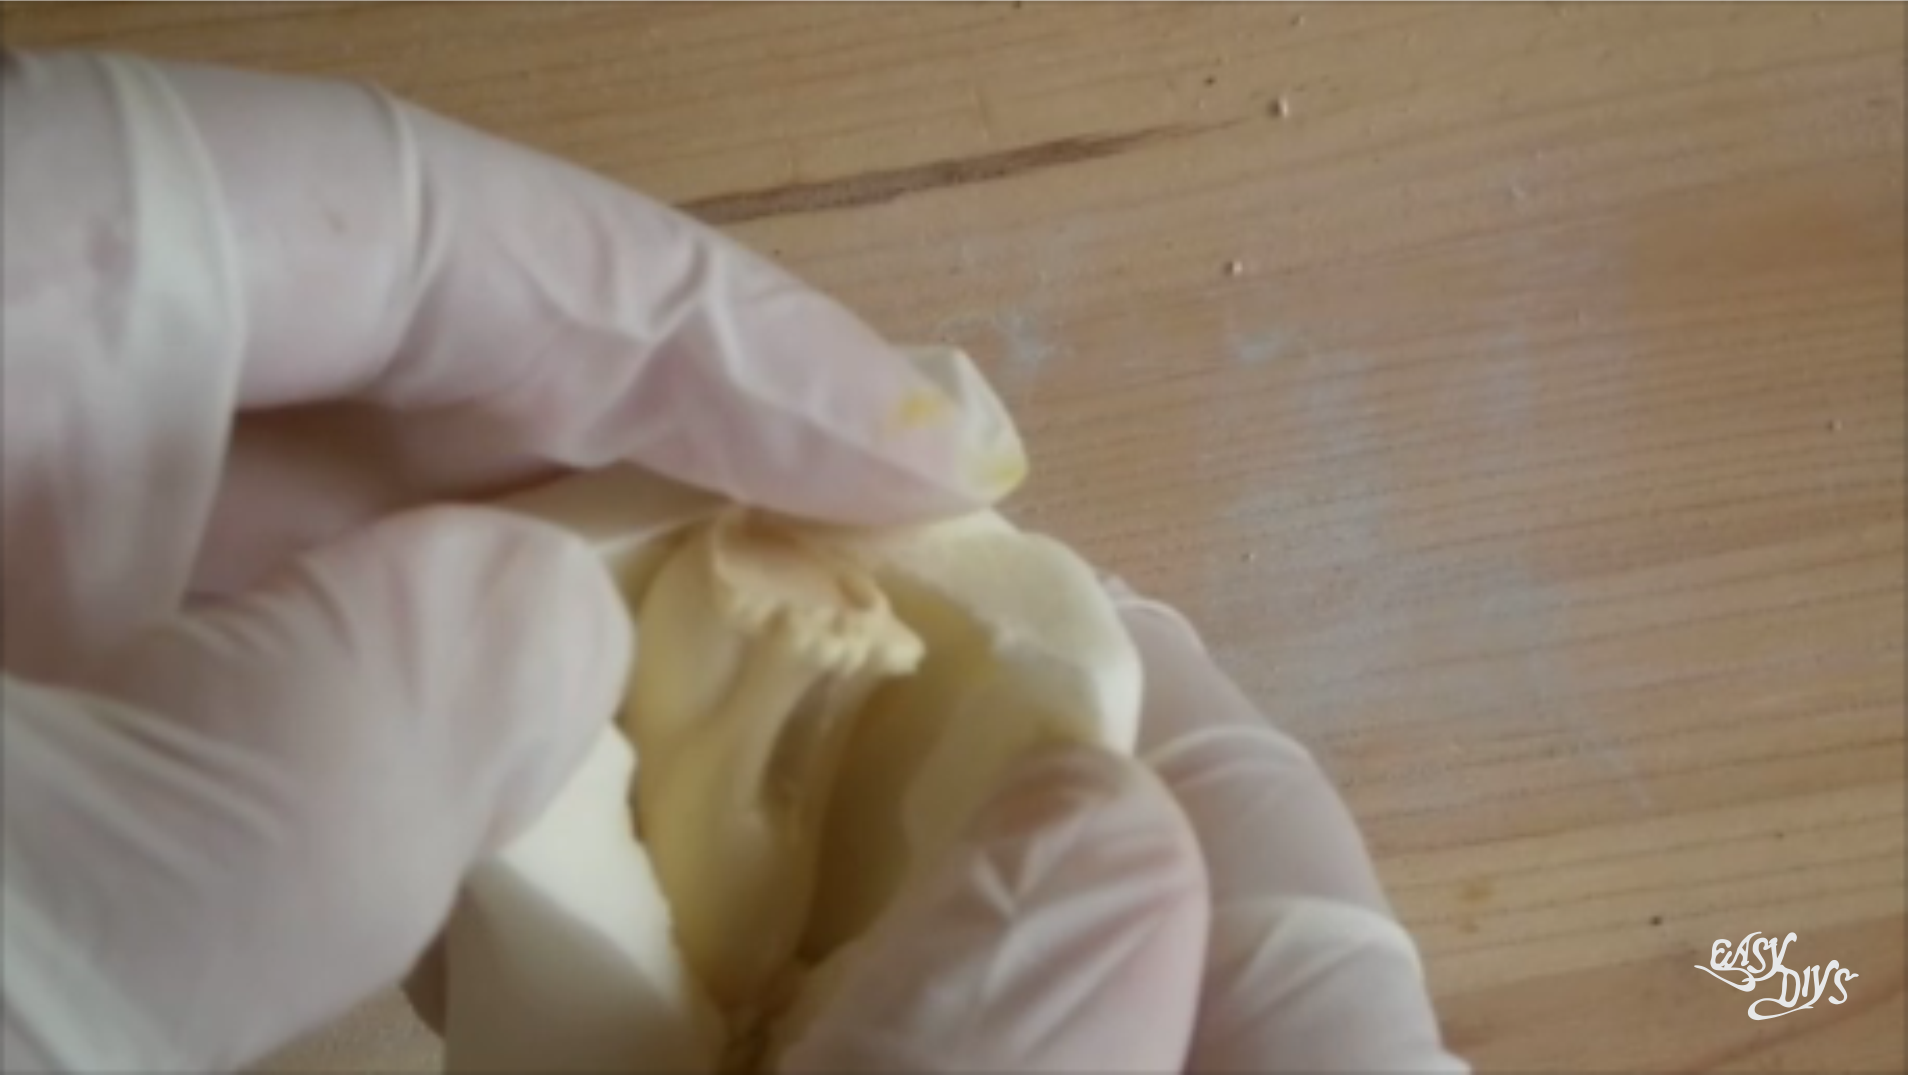
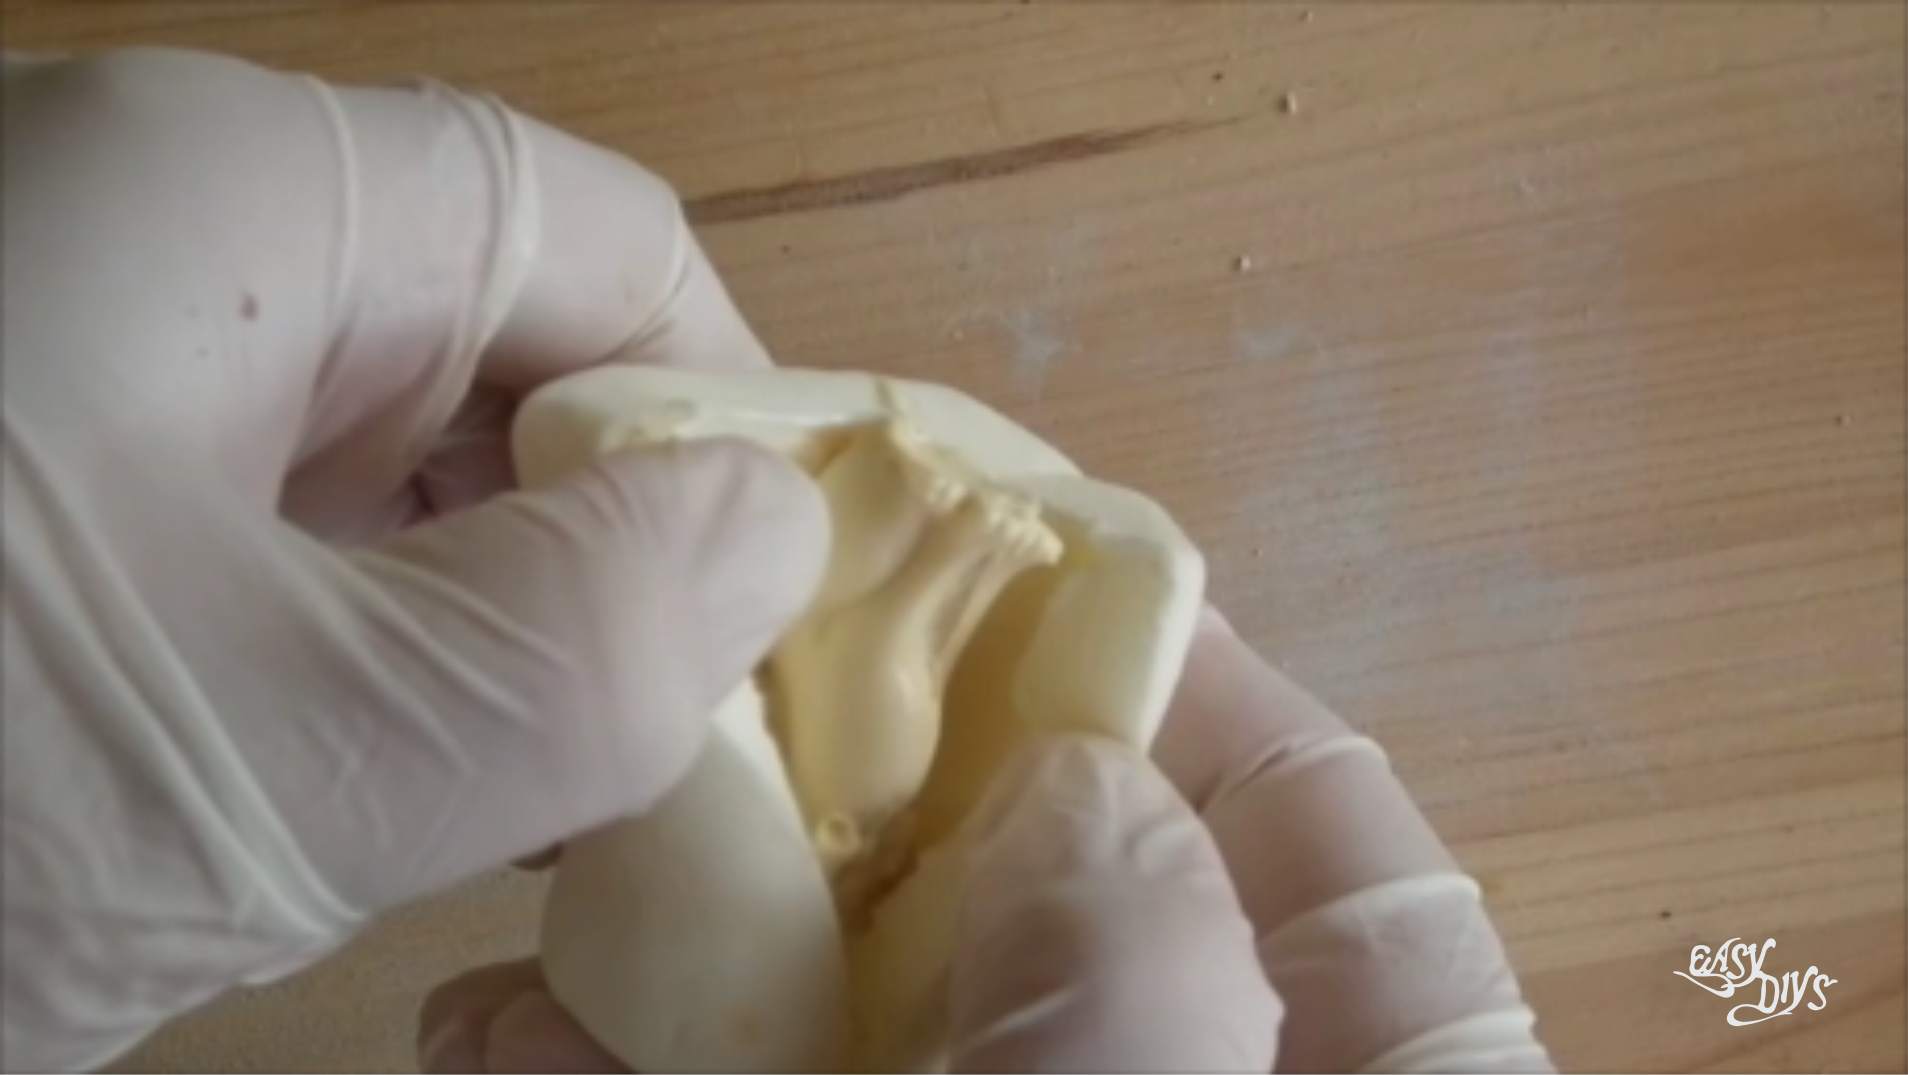
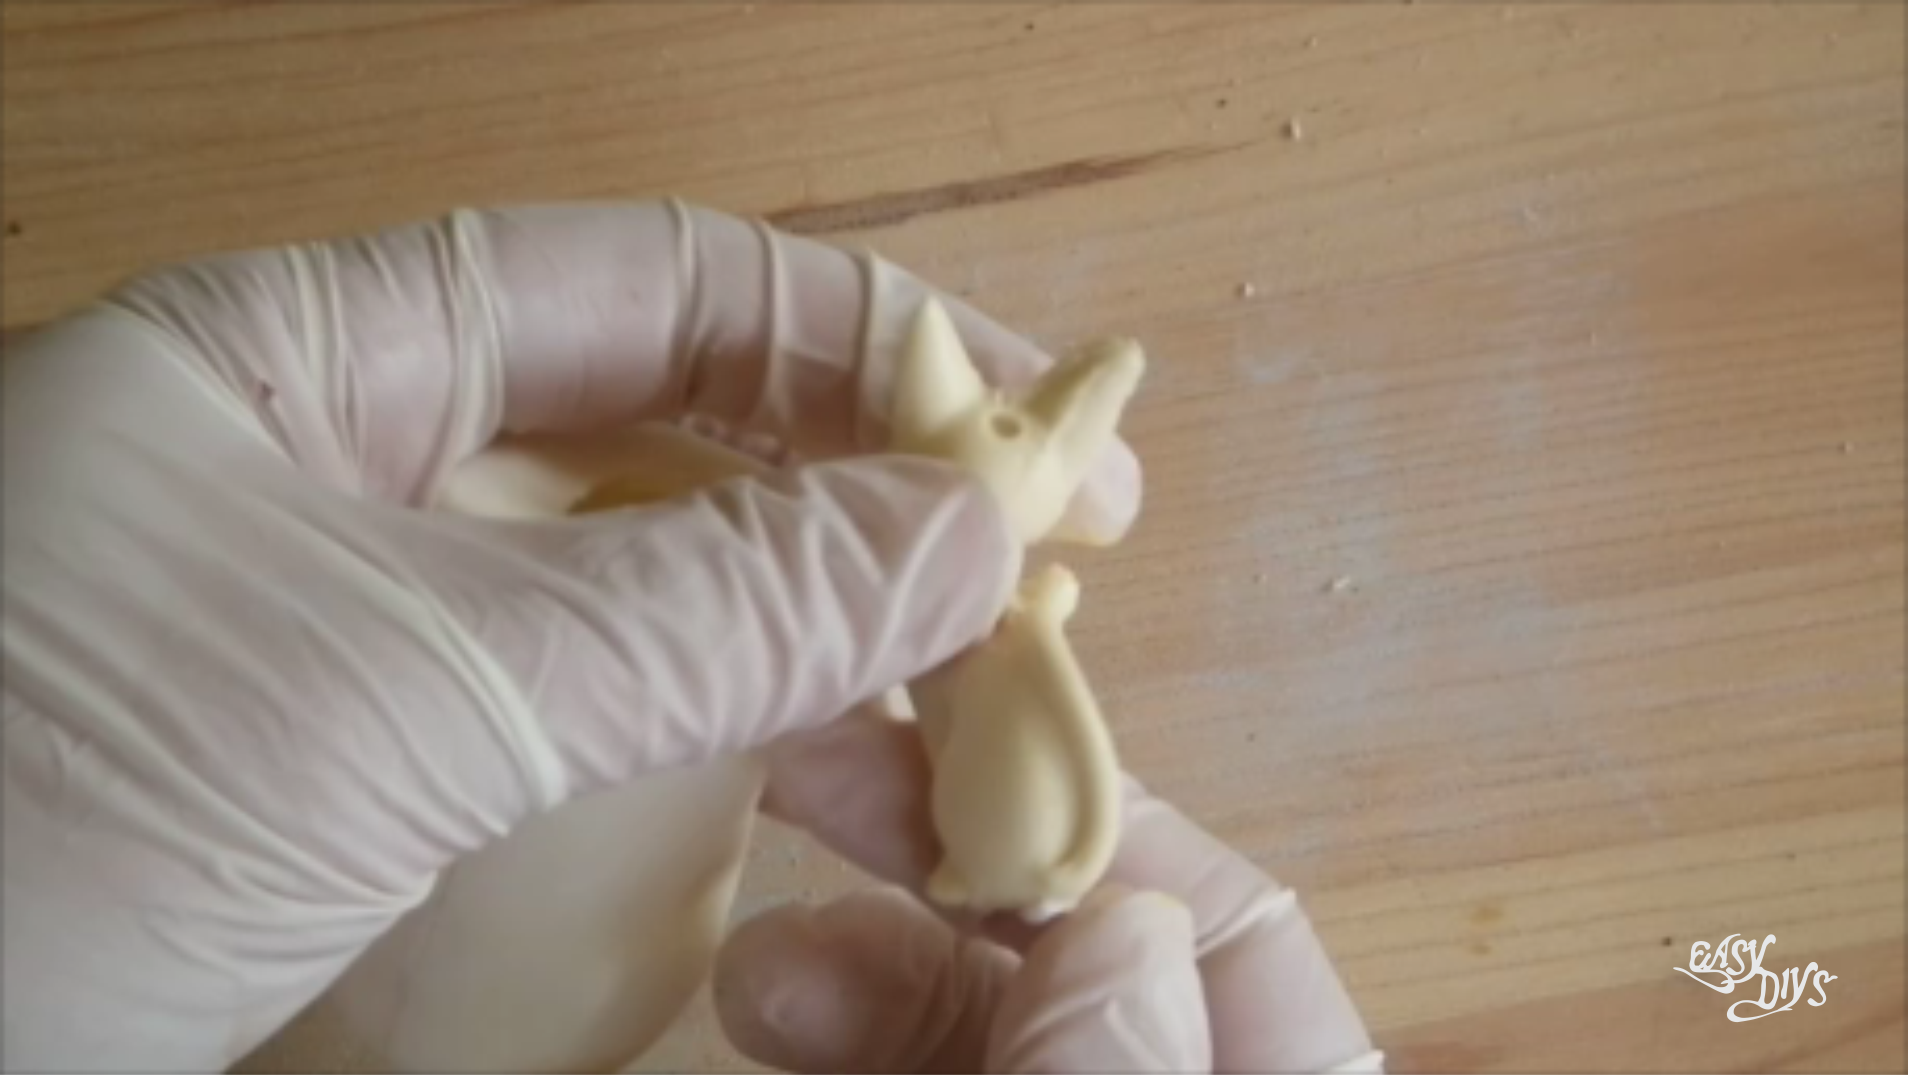
As I’ve said, there’s always a seam to be cleaned up .. but in this event the work was minimal. Polyurethane resin can be tooled (worked with power tools, carved or sanded) very easily.
Painting is another subject in itself, which I will probably deal with at some point, but for the moment.. the polyurethane cast should ideally be given a few days to fully cure. Lastly the form needs a good priming coat using a spray primer, the best of which is Simoniz Acrylic primer. The most reliable, hard-wearing and versatile paints I’ve found, all of which are suitable on plastic if primed, are; Humbrol enamels, Rosco ‘Supersaturated’ scenic acrylics or Osmo oil/wax wood paints.

Where to get the materials?
If you get your mouldmaking and casting materials from a regular art or hobby shop you’ll get discouraged pretty quickly because of the expense. I always turn to Amazon for a cheaper alternative to what i find in the normal store. You will pay much less for better quality materialsIs expensive equipment needed?
The most expensive piece of equipment I use is a digital kitchen scales which cost around £6. Professionals who provide mouldmaking/casting services for a living may well benefit from special ‘degassing’ or pressure chambers to eliminate air bubbles etc. but one can often achieve perfectly good results without them.What sort of space is needed?
Yes, if you’re content to work on small things and you can keep children at a respectful distance. But often it can be difficult to simply clear things away at short notice. Some extra space is needed to leave moulds undisturbed for a day while curing; the room should at least have possibilities for ventilation; table-top and floor should be covered in case of spillages. ![]()

