DIY Burlap Christmas Ornaments

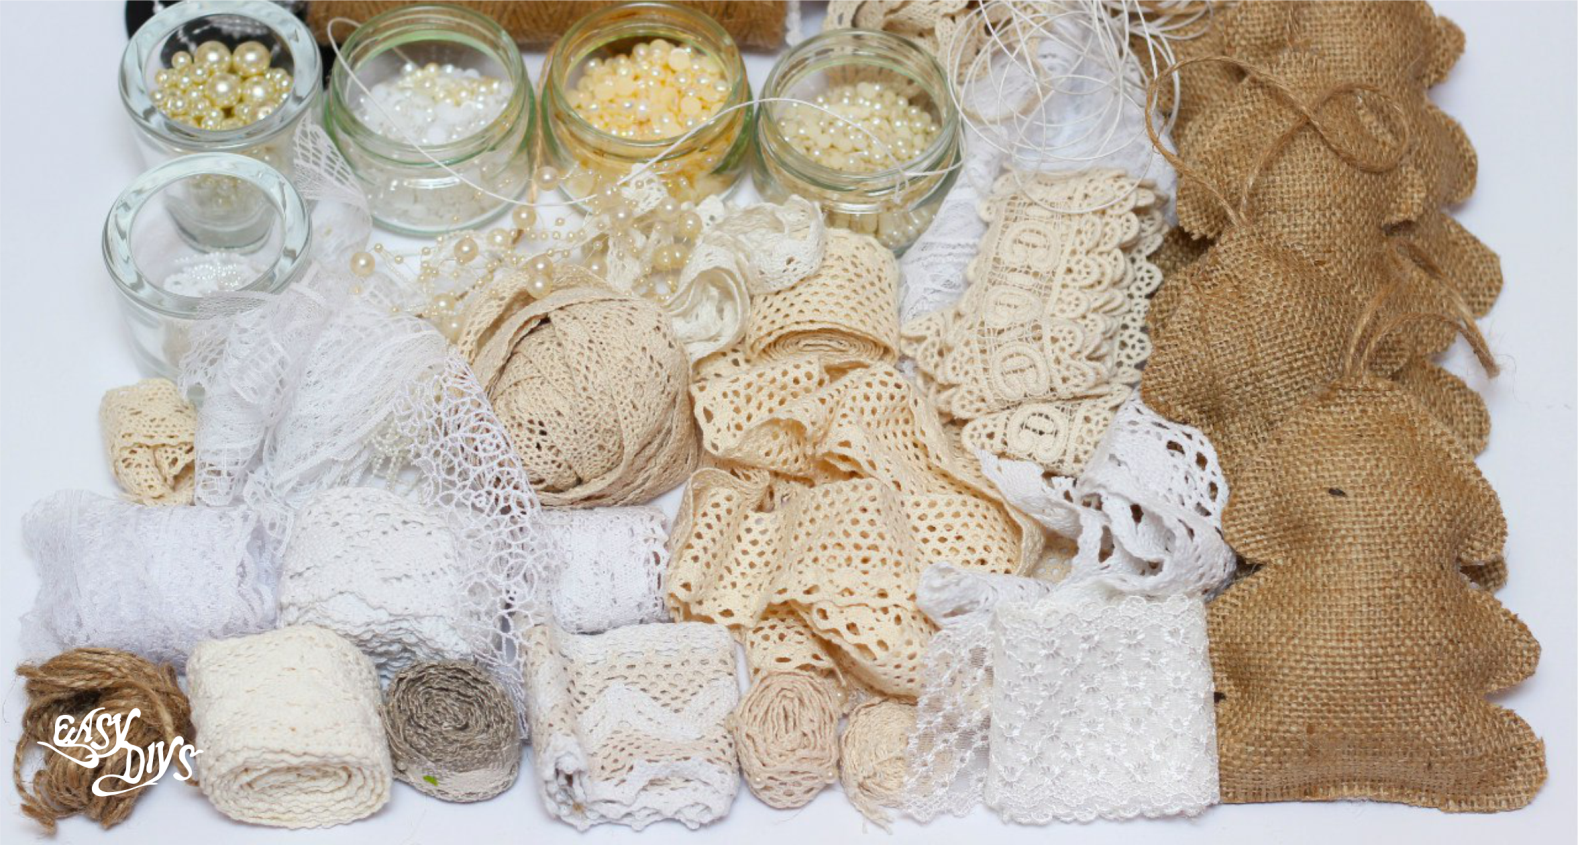
Burlap Christmas Ornaments are quite possibly the easiest, cutest DIY Ornaments EVER! And it’s fun to personalize them a bit! How?! …with a buttons, Lace Flowers, pearls….! I’ll show you how to make it with a little step by step tutorial.
I love a Christmas Tree with a mix of glass blown ornaments and burlap crafty ornaments…the blend is perfect!
You Will Need:
Burlap fabric
Bakers Twine or thread
Fabric glue
Scissors
Paper to make a pattern for your ornament shape
Lace Flowers, pearls, buttons…
Instructions:
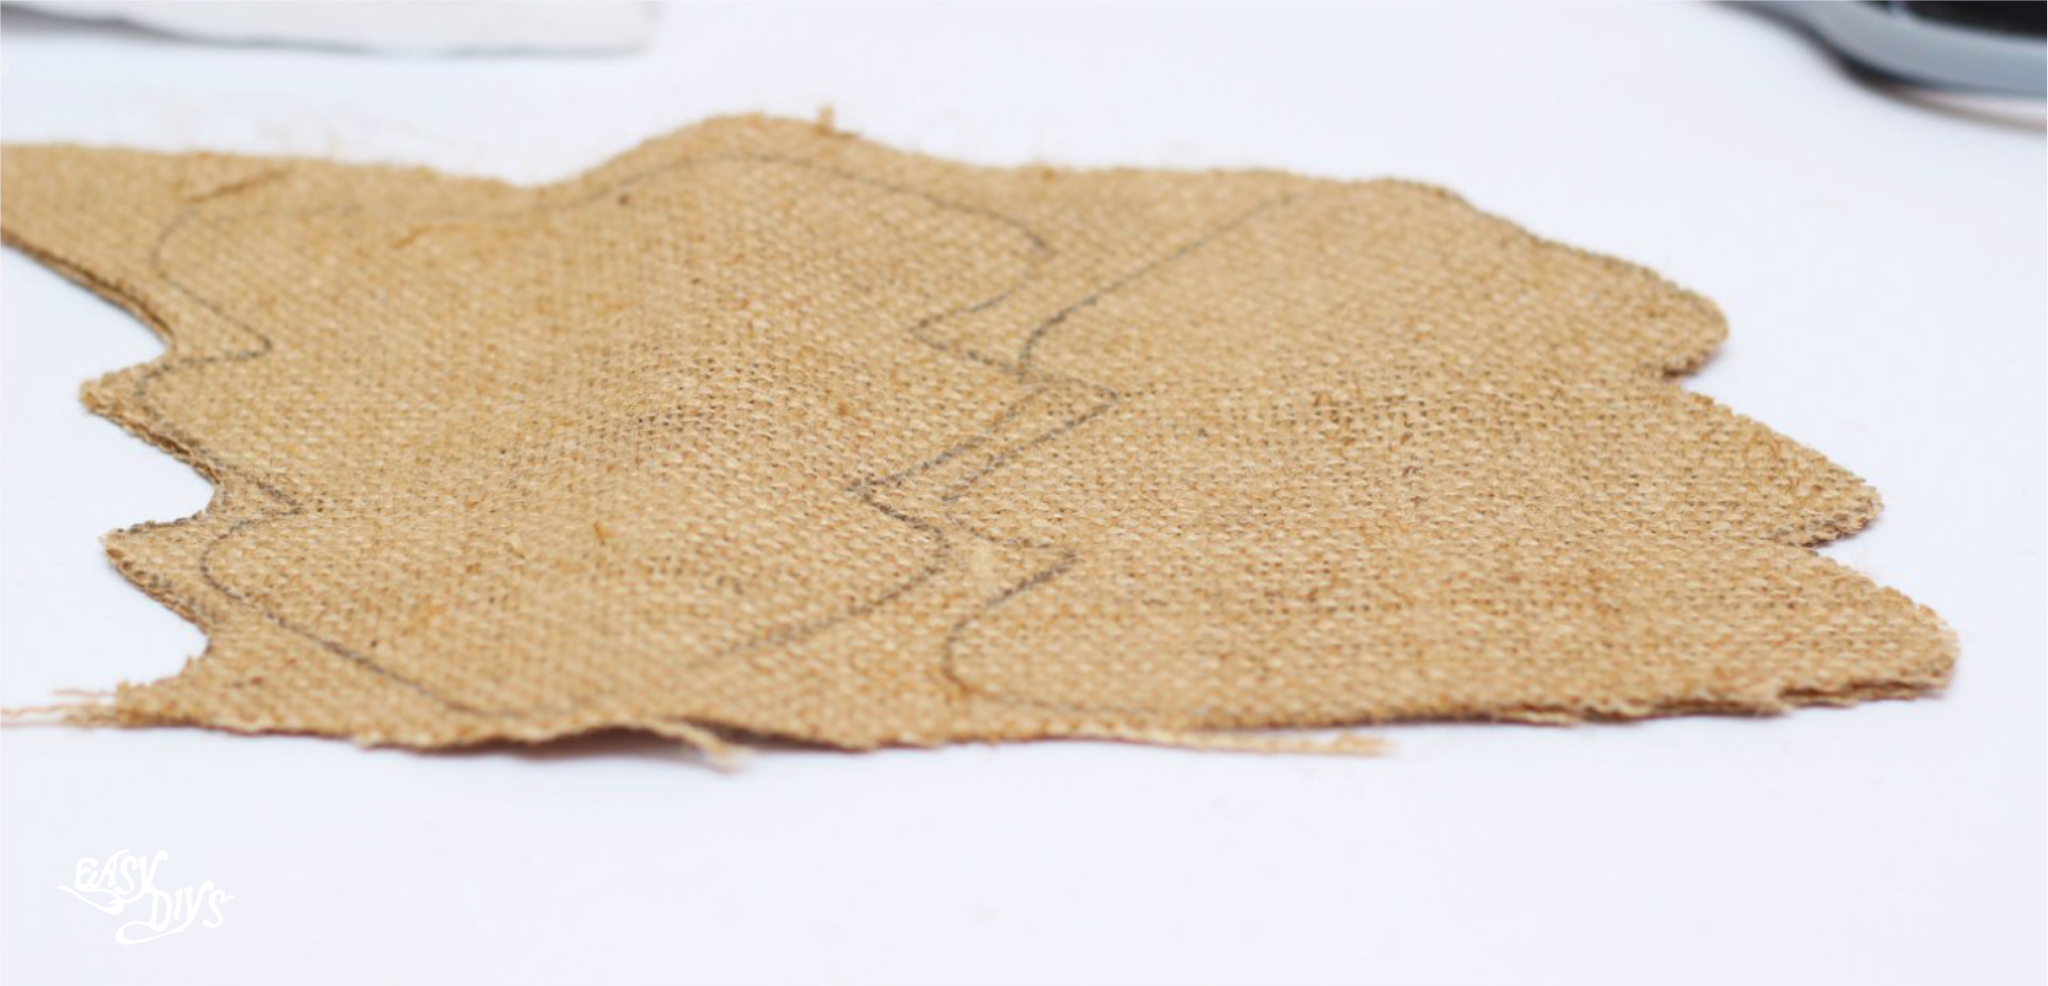
Take your paper and make a pattern for your ornament shape. Once you have your pattern trace around it on your burlap fabric. Trace 2 of each pattern, youll need a front and back.
Note: You can buy burlap fabric at most fabric stores.

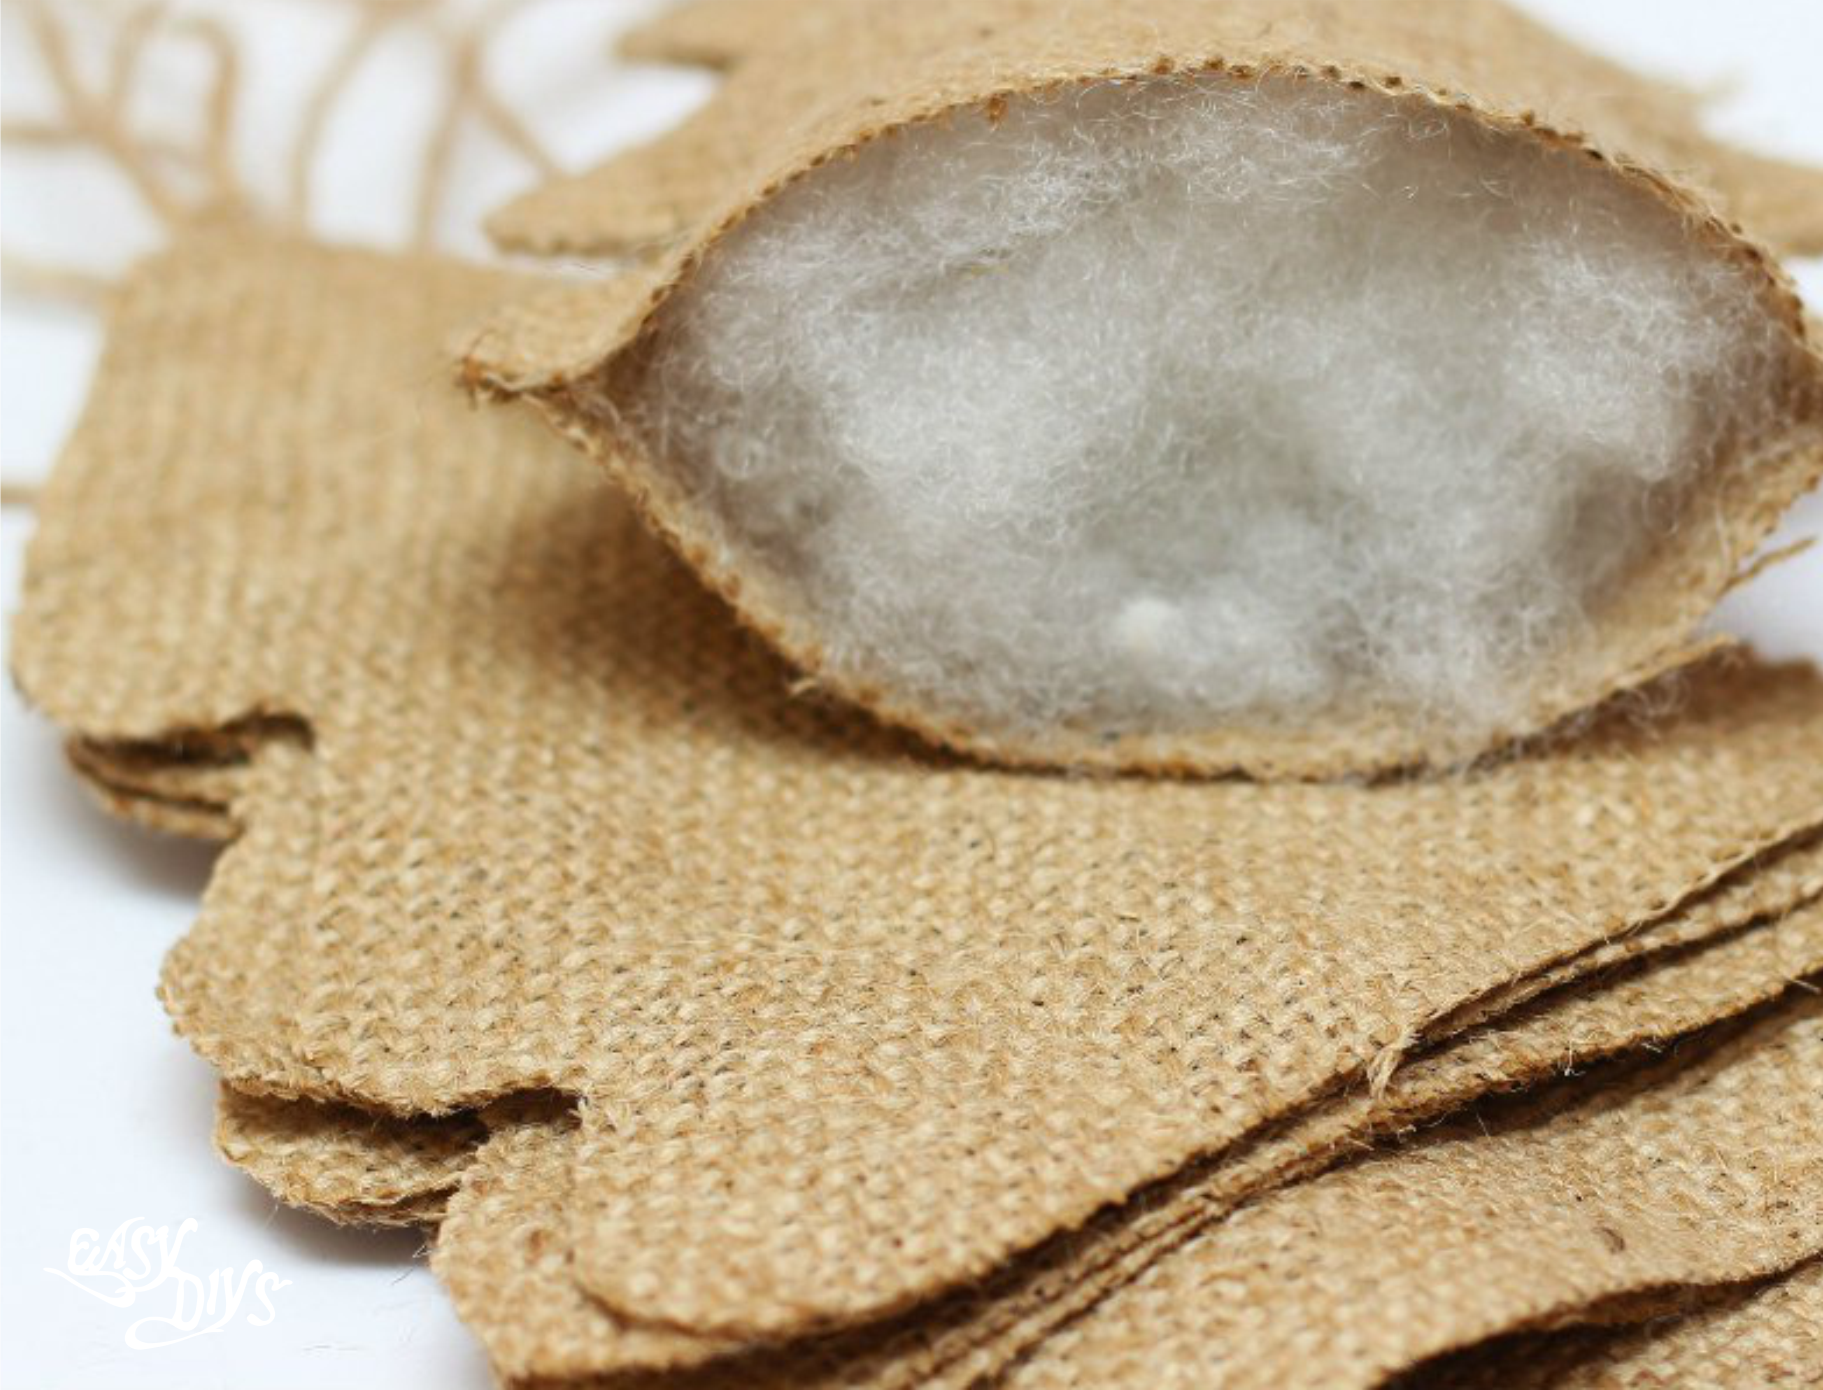
Lay your back piece on a flat surface and put your fabric glue all the way around the edge of your fabric, leaving at least a 2 cm. space that you will use to stuff your ornament. Let your fabric glue dry.
Once your glue is dry, youre ready to stuff your ornament. Carefully push a small amount of stuffing inside your ornament, dont over fill it.

Cut about an 10 cm. piece of baker’s twine and fold it in half. Add fabric glue to the ornament opening, and place the ends of your folded baker’s twine inside your ornament on the glue. Press your ornament together and let dry.

They’re also a great way to use up lots of decorative odds and ends from your stash – mix and match embellishments to create a whole set to hang on the tree.
I love the look of rustic holiday decorations!
![]()

